「ESRI シェープファイル」の版間の差分
(→Shapefileのロード) |
(→Shapefileのロード) |
||
| 行38: | 行38: | ||
--> | --> | ||
| + | 指定可能なオプションファイルをチェックします。ブラウズをクリックします。 | ||
| + | そうすると標準的なファイルダイアログが表示されます([[#Figure 6|6]]参照) | ||
| + | そこではファイルシステムの中を探してshapefileかサポートされているデータソースをロードできます。 | ||
| + | 選択ボックスのファイルのtype..でいくつかのOGRで利用できるファイル形式をあらかじめ選択できます。 | ||
| + | <!-- | ||
From the available options check File. Click on Browse. | From the available options check File. Click on Browse. | ||
That will bring up a standard open file dialog (see Figure | That will bring up a standard open file dialog (see Figure | ||
| 行43: | 行48: | ||
a shapefile or other supported data source. | a shapefile or other supported data source. | ||
The selection box Files of type... allows you to preselect some OGR supported file formats. | The selection box Files of type... allows you to preselect some OGR supported file formats. | ||
| + | --> | ||
{{Template:Figure|num=5|caption=Add Vector Layer Dialog|fname=Addvectorlayerdialog}} | {{Template:Figure|num=5|caption=Add Vector Layer Dialog|fname=Addvectorlayerdialog}} | ||
| + | 必要があればshapefileのエンコーディングタイプ(文字コード)を指定できます。 | ||
| + | <!-- | ||
You can also select the Encoding type for the shapefile if desired. | You can also select the Encoding type for the shapefile if desired. | ||
| + | --> | ||
| + | |||
| + | shapefileをリストから選択して{{Template:Button|Open}}をクリックするとQGISにロードできます。 | ||
| + | Figure [[#Figure 7|7]]はalaska.shpをQGISにロードした後の図です。 | ||
| + | |||
| + | <!-- | ||
Selecting a shapefile from the list and clicking {{Template:Button|Open}} loads it into QGIS. Figure | Selecting a shapefile from the list and clicking {{Template:Button|Open}} loads it into QGIS. Figure | ||
[[#Figure 7|7]] shows QGIS after loading the alaska.shp file. | [[#Figure 7|7]] shows QGIS after loading the alaska.shp file. | ||
| + | --> | ||
---- | ---- | ||
2009年9月14日 (月) 20:35時点における版
目次
ESRI シェープファイル
QGISで使う標準的なベクトルファイル形式はESRI Shapefileです。ShapefileはOGRの Simple Feature Library( http://www.gdal.org/ogr/ ) の機能を利用してサポートされてます。実際にはshapefileはいくつかのファイルで構成されています。以下の3種類のファイルは必須で必要です:
- .shp ファイルには知物の幾何情報が格納されています。
- .dbf ファイルには属性情報がdBase形式で格納されています。
- .shx インデックスファイルです。
Shapefiles には.prj という拡張子のファイルもあります。このファイルには投影情報が格納されます。
投影情報ファイルはとても便利ですが、このファイルの利用は必須ではありません。
shapefileのデータセットは様々な追加ファイルを持てます。詳細についてはESRIテクニカルスペシフィケーション http://www.esri.com/library/whitepapers/pdfs/shapefile.pdf を参照してください。
Shapefileのロード
![]() shapefileをロードするためにはQGISを開始した後にツールば
ボタン
shapefileをロードするためにはQGISを開始した後にツールば
ボタン![]() Add a vector layerをクリックするかVをキーボード入力してください。そうすると(see Figure5)の新規ウィンドウが表示されます。
Add a vector layerをクリックするかVをキーボード入力してください。そうすると(see Figure5)の新規ウィンドウが表示されます。
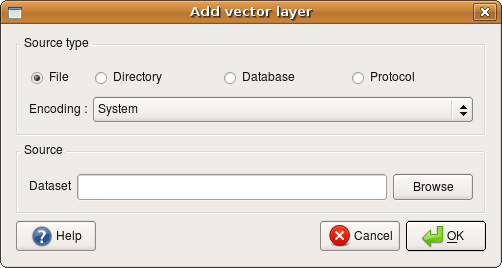
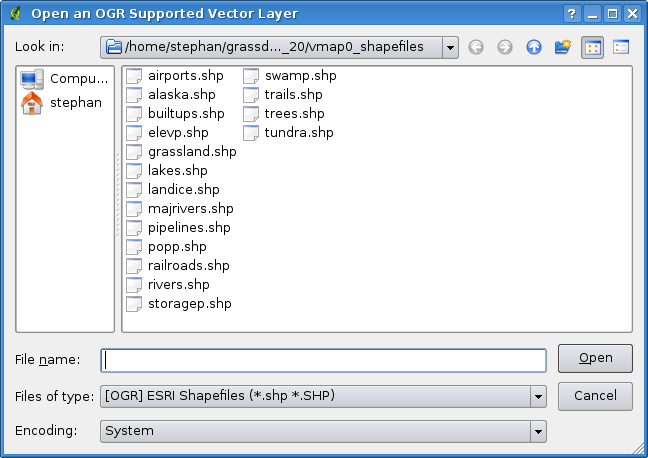
指定可能なオプションファイルをチェックします。ブラウズをクリックします。 そうすると標準的なファイルダイアログが表示されます(6参照) そこではファイルシステムの中を探してshapefileかサポートされているデータソースをロードできます。 選択ボックスのファイルのtype..でいくつかのOGRで利用できるファイル形式をあらかじめ選択できます。
| 図 5: Add Vector Layer Dialog |
 |
必要があればshapefileのエンコーディングタイプ(文字コード)を指定できます。
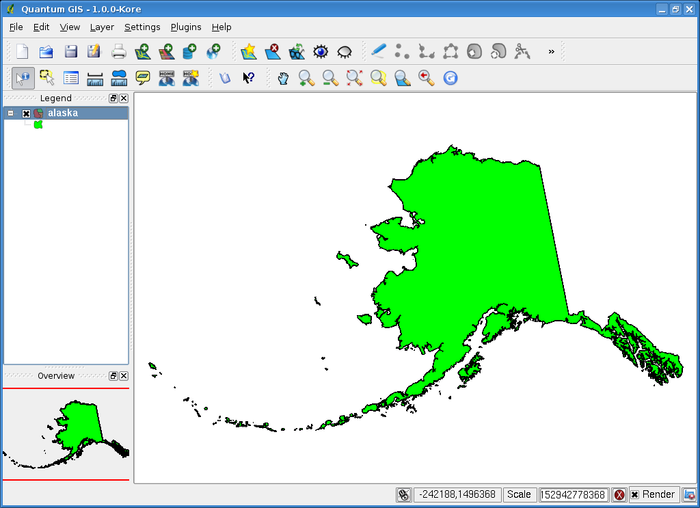
shapefileをリストから選択してOpenをクリックするとQGISにロードできます。
Figure 7はalaska.shpをQGISにロードした後の図です。
Tip 8
When you add a layer to the map, it is assigned a random color. When adding more than one layer at a time, different colors are assigned to each layer.
Once loaded, you can zoom around the shapefile using the map navigation tools. To change the symbology of a layer, open the Layer Properties dialog by double clicking on the layer name or by right-clicking on the name in the legend and choosing Properties from the popup menu. See Section 5.4.2 for more information on setting symbology of vector layers.
パフォーマンスの改善
To improve the performance of drawing a shapefile, you can create a spatial index. A spatial index will improve the speed of both zooming and panning. Spatial indexes used by QGIS have a .qix extension.
Use these steps to create the index:
- Load a shapefile.
- Open the Layer Properties dialog by double-clicking on the
shapefile name in the legend or by right-clicking and choosing Properties from the popup menu.
| 図 6: Open an OGR Supported Vector Layer Dialog |
 |
- In the tab General click the Create Spatial Index button.
MapInfo Layerのロード
To load a MapInfo layer, click on the
![]() Add a vector layer
toolbar bar button or type V, change the file type filter to
Files of Type [OGR] MapInfo (*.mif *.tab *.MIF *.TAB)
Add a vector layer
toolbar bar button or type V, change the file type filter to
Files of Type [OGR] MapInfo (*.mif *.tab *.MIF *.TAB) ![]() and select the layer you want to load.
and select the layer you want to load.
ArcInfo Binary Coverageのロード
To load an ArcInfo binary coverage click on the
![]() Add a vector layer
toolbar button or type V to open the
Add Vector Layer dialog. Select
Add a vector layer
toolbar button or type V to open the
Add Vector Layer dialog. Select ![]() Directory. Change to Type Arc/Ingo Binary Coverage
Directory. Change to Type Arc/Ingo Binary Coverage ![]() .
Navigate to the directory that contains the coverage files and select it.
.
Navigate to the directory that contains the coverage files and select it.
| 図 7: QGIS with Shapefile of Alaska loaded |
 |
Similarly, you can load directory based vector files in the UK National Transfer Format as well as the
raw TIGER Format of the US Census Bureau.