Plugins decorations
Decorations Plugins
The Decorations Plugins includes the Copyright Label Plugin, the North Arrow Plugin and the Scale Bar Plugin. They are used to "decorate" the map by adding cartographic elements.
Copyright Label Plugin
The title of this plugin is a bit misleading - you can add any random text to the map.
 |
- Make sure the plugin is loaded
- Click on Plugins > Decorations >
 Copyright Label or use the
  Copyright Label button from the Toolbar.
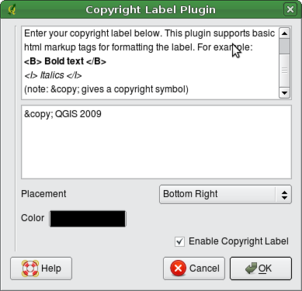
- Enter the text you want to place on the map. You can use HTML as shown in the example
- Choose the placement of the label from the Placement Bottom Right
 drop-down box
- Make sure the
 Enable Copyright Label checkbox is checked
- Click OK
In the example above (default) places a copyright symbol followed by the date in the lower right hand corner of the map canvas.
North Arrow Plugin
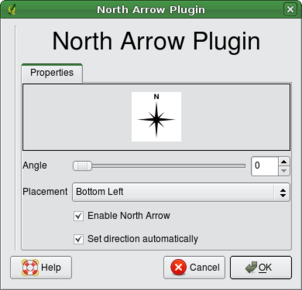
The North Arrow plugin places a simple north arrow on the map canvas. At present there is only one style available. You can adjust the angle of the arrow or let QGIS set the direction automatically. If you choose to let QGIS determine the direction, it makes its best guess as to how the arrow should be oriented. For placement of the arrow you have four options, corresponding to the four corners of the map canvas.
 |
Scale Bar Plugin
The Scale Bar plugin adds a simple scale bar to the map canvas. You control the style and placement, as well as the labeling of the bar.
QGIS only supports displaying the scale in the same units as your map frame. So if the units of your layers are in meters, you can't create a scale bar in feet. Likewise if you are using decimal degrees, you can't create a scale bar to display distance in meters.
To add a scale bar:
- Click on Plugins > Decorations >
 Scale Bar or use the
  Scale Bar button from the Toolbar.
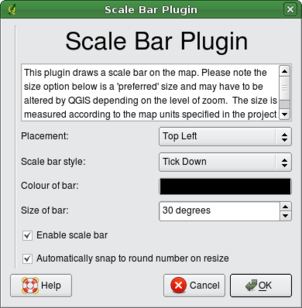
- Choose the placement from the Placement Bottom Left
 drop-down list
- Choose the style from the Scale bar style Tick Down
 list
list
- Select the color for the bar Color of bar or use the default black color
- Set the size of the bar and its label Size of bar30 degrees

- Make sure the
 Enable scale bar checkbox is checked
- Optionally choose to automatically snap to a round number when the
canvas is resized
 Automatically snap to round number on resize
- Click OK
 |